
Hyderabadi-style paneer curry can go wrong quickly when the spices are added without order. The sauce may taste flat, bitter, too sharp, or heavy. The useful point is not only which spices to use, but when to use them and how much heat they need.
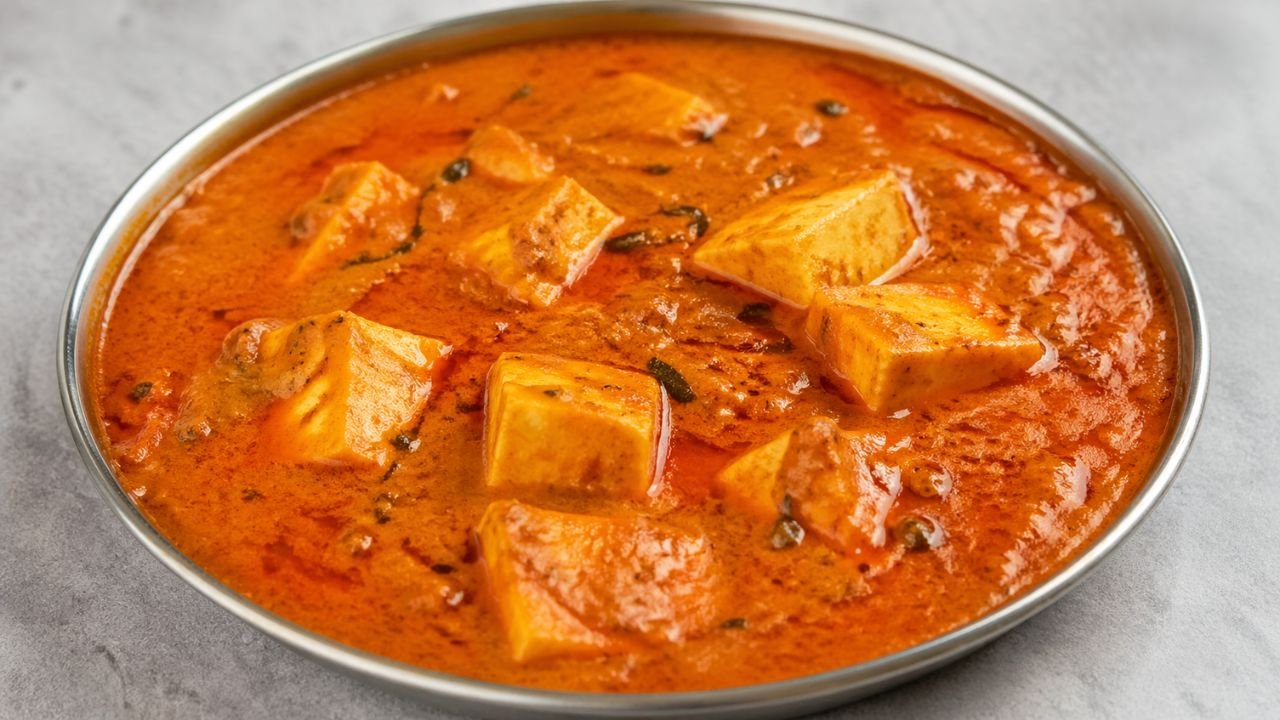
This recipe uses eight practical spices to build a rich paneer curry with a deep, warm gravy. It is designed for a home kitchen, with ingredients that are easy to find and steps that do not require restaurant equipment. The paneer stays soft, the gravy stays balanced, and the spice mix gives the curry a Hyderabadi-style character without making the cooking complicated.
Ingredients
- 400 g paneer, cut into medium cubes. Use fresh paneer if possible; frozen paneer should be thawed fully.
- 2 medium onions, thinly sliced. These give body and sweetness to the gravy.
- 2 medium tomatoes, chopped, or 180 ml tomato purée. Use purée for a smoother sauce.
- 3 tablespoons plain yogurt, whisked. Full-fat yogurt is easier to cook without splitting.
- 2 tablespoons cashews, soaked in hot water for 15 minutes. This helps thicken the gravy.
- 1 tablespoon desiccated coconut or fresh grated coconut. Optional, but useful for a fuller Hyderabadi-style base.
- 1 tablespoon ginger-garlic paste.
- 2 tablespoons oil or ghee. Oil is lighter; ghee gives a richer finish.
- 120 to 180 ml water, as needed for the gravy.
- Salt, to taste.
- 1 tablespoon chopped coriander leaves, for finishing.
- 1 teaspoon lemon juice, only if the curry tastes too heavy at the end.
- Spice 1: 1 teaspoon cumin seeds.
- Spice 2: 4 green cardamom pods, lightly crushed.
- Spice 3: 3 cloves.
- Spice 4: 1 small cinnamon stick.
- Spice 5: 1 teaspoon coriander powder.
- Spice 6: 1/2 teaspoon turmeric powder.
- Spice 7: 1 teaspoon red chilli powder, adjusted to taste. Use Kashmiri chilli powder for colour and mild heat.
- Spice 8: 1/2 teaspoon garam masala, added near the end.
Preparation
Start by preparing the paneer. If the paneer feels firm or dry, place the cubes in warm water for 10 minutes, then drain. This small step helps the paneer stay soft after it goes into the hot gravy. Do not boil the paneer, because direct boiling can make the surface rubbery.
Soak the cashews in hot water. If using coconut, keep it ready with the cashews. After 15 minutes, blend the cashews and coconut with a few tablespoons of water until smooth. A slightly coarse paste is acceptable, but a smoother paste gives a better curry texture.
Heat the oil or ghee in a heavy pan over medium heat. Add cumin seeds, cardamom, cloves, and cinnamon. Let them sizzle gently for 30 to 40 seconds. The goal is to warm them, not burn them. If the cloves darken too fast or the cumin turns black, the heat is too high and the gravy may taste bitter.
Add the sliced onions with a pinch of salt. Cook them slowly until golden. This step matters because the onions form the base of the curry. Pale onions make a thin and sharp-tasting gravy. Burnt onions make the whole curry taste harsh. Aim for a deep golden colour, not dark brown.
Add the ginger-garlic paste and cook for about one minute. Stir often so it does not stick to the bottom. It should lose its raw smell before the tomatoes go in.
Add the chopped tomatoes or tomato purée. Cook until the mixture thickens and the oil begins to show around the edges. This usually takes 6 to 8 minutes with chopped tomatoes and slightly less with purée. If the mixture sticks, add one or two tablespoons of water and keep cooking.
Lower the heat before adding the ground spices. Add coriander powder, turmeric powder, and red chilli powder. Stir them into the tomato-onion base for 30 seconds. Do not fry powdered spices for too long in a dry pan. They need heat to open up, but they burn faster than whole spices.
Add the cashew-coconut paste and stir well. Cook for 3 to 4 minutes until the paste blends into the sauce. The gravy will thicken at this point. Keep the heat medium-low and stir along the bottom of the pan, because nut pastes can catch quickly.
Whisk the yogurt until smooth. Lower the heat to the lowest setting, then add the yogurt one spoonful at a time, stirring after each addition. This is the safest way to avoid a split sauce. Once all the yogurt is mixed in, cook gently for 2 minutes.
Add 120 ml water and stir to loosen the gravy. Simmer for 5 minutes. The sauce should be thick enough to coat the paneer but not so thick that it sits in clumps. Add more water if needed.
Add the paneer cubes and fold them in gently. Simmer for 3 to 5 minutes only. Paneer does not need long cooking. Long simmering makes it firmer and can dull the freshness of the curry. Add garam masala near the end and stir once or twice.
Taste the gravy. Adjust salt. If it tastes heavy or too sweet from the onions and cashews, add a few drops of lemon juice. Finish with chopped coriander leaves. Let the curry rest for 5 minutes before serving, because the paneer absorbs some of the gravy while it sits.
Cooking, Baking, or Use Tips
The eight spices in this Hyderabadi-style paneer curry do different jobs. Cumin gives the first warm base note. Cardamom, cloves, and cinnamon add the whole-spice aroma that makes the curry feel deeper. Coriander powder gives body. Turmeric adds earthiness and colour. Red chilli powder controls heat and colour. Garam masala finishes the curry without needing long cooking.
A practical way to avoid harsh spice flavour is to divide the spices by cooking time. Whole spices can go into hot fat at the beginning. Powdered spices should go in after the tomatoes have softened. Garam masala should go near the end. This timing gives a rounder curry and prevents the common problem of bitter chilli powder or burnt turmeric.
For a small kitchen test, look at the oil around the masala before adding paneer. If the sauce still looks watery and raw, the spices will taste separate from the gravy. If the oil has started to show lightly around the edges, the masala is cooked enough. You do not need a large pool of oil. A light shine around the sides of the pan is a better home-cooking signal.
Paneer texture depends more on timing than on the brand of paneer. If paneer is simmered for 15 or 20 minutes, it usually turns firm. Add it only after the gravy is almost finished. If the paneer is very fresh and soft, fold it in carefully and simmer for just 2 or 3 minutes. If it is firmer, soak it in warm water first and simmer for 5 minutes.
Yogurt can split when it meets high heat. The safest method is simple: whisk it, lower the flame, add it slowly, and keep stirring. If the pan is very hot, remove it from the heat for one minute before adding the yogurt. Once the yogurt is mixed in, return the pan to low heat. This works better than trying to fix a split sauce later.
If the curry tastes flat, it usually needs salt, not more spices. Add a small pinch of salt, stir, and taste again. If it tastes too heavy, use lemon juice at the end rather than adding more tomato. Extra tomato can make the curry sharp and change the balance of the spices.
If the sauce becomes too thick, add hot water instead of cold water. Hot water blends more easily into the gravy and does not drop the cooking temperature too much. Add it in small amounts. A Hyderabadi-style paneer curry should feel rich, but it should still move when spooned over rice or bread.
Use medium heat for most of the recipe. High heat browns onions faster, but it also makes them uneven. Some pieces burn while others stay pale. Medium heat gives a sweeter onion base and makes the curry taste more balanced. A heavy pan helps because it spreads heat better and reduces sticking.
For serving, match the thickness of the gravy to the side dish. With naan, roti, or paratha, keep the sauce thicker so it clings well. With steamed rice, jeera rice, or simple pulao, loosen it with a little more water so it spreads through the rice. This small adjustment makes the same curry more useful for different meals.
Leftover gravy should not be wasted. If you have sauce left but very little paneer, add boiled eggs, cooked potatoes, peas, or sautéed mushrooms the next day. The spice base is strong enough to carry another ingredient. Add a splash of water while reheating, because the cashew paste thickens in the fridge.
Useful Kitchen Tools
A heavy-bottomed pan helps cook the onions and spice paste evenly without burning. A small blender is useful for making the cashew and coconut paste smooth. A silicone spatula or flat wooden spoon also helps scrape the base of the pan while the gravy thickens.
Variations or Conservation
This recipe can be adjusted without losing its main character. The important point is to keep the order of cooking the spices and to avoid overcooking the paneer.
- For a lighter curry, reduce the cashews to 1 tablespoon and skip the coconut. The sauce will be less creamy but still flavourful.
- For a richer curry, use ghee and add 1 tablespoon of cream at the end. Do not boil hard after adding cream.
- For a nut-free version, replace the cashew paste with 2 tablespoons of thick yogurt or a small amount of blended cooked onion. The gravy will be less silky but still practical.
- For more heat, add a slit green chilli with the onions. This gives a fresher heat than simply increasing chilli powder.
- For a vegetable version, add peas, capsicum, or lightly cooked cauliflower along with the paneer. Avoid watery vegetables unless they are cooked down first.
The curry keeps well in the fridge for up to 3 days in a closed container. Let it cool before storing, but do not leave it out for a long time. The gravy thickens as it rests, especially because of the cashews and paneer.
To reheat, use a pan over low heat and add a few tablespoons of water. Stir gently and warm only until hot. Avoid hard boiling. If reheating in a microwave, use medium power and stir halfway through. Paneer becomes firmer when overheated, so gentle reheating is better.
Freezing is possible, but the texture of paneer and yogurt-based gravy can change. If you want to freeze part of the recipe, freeze the gravy before adding paneer. Later, thaw the gravy, reheat it gently, and add fresh paneer near the end. This gives a better result than freezing the finished curry.
For meal planning, make the masala base one day ahead. Cook the onions, tomatoes, spices, and cashew paste, then cool and refrigerate. The next day, reheat the base with a little water, add yogurt slowly, and finish with paneer and garam masala. This saves time and keeps the paneer fresh.
If you have extra whole spices after cooking, store them in a dry, closed container away from heat. Do not keep spice jars beside the stove if possible. Steam and heat reduce their aroma faster. For everyday cooking, buying smaller amounts of cardamom, cloves, and cinnamon is often better than keeping large jars for too long.
Conclusion
A good Hyderabadi-style paneer curry does not need a long ingredient list or difficult technique. It needs the right eight spices, added at the right time, with enough patience for the onion and tomato base to cook properly. The recipe is practical for a weekday meal but still rich enough for guests.
It is also flexible and low-waste. Leftover gravy can be reused with vegetables, eggs, or potatoes, and the masala base can be made ahead. Once the spice timing is clear, this curry becomes easy to repeat, adjust, and serve with whatever bread or rice is already in the kitchen.
