
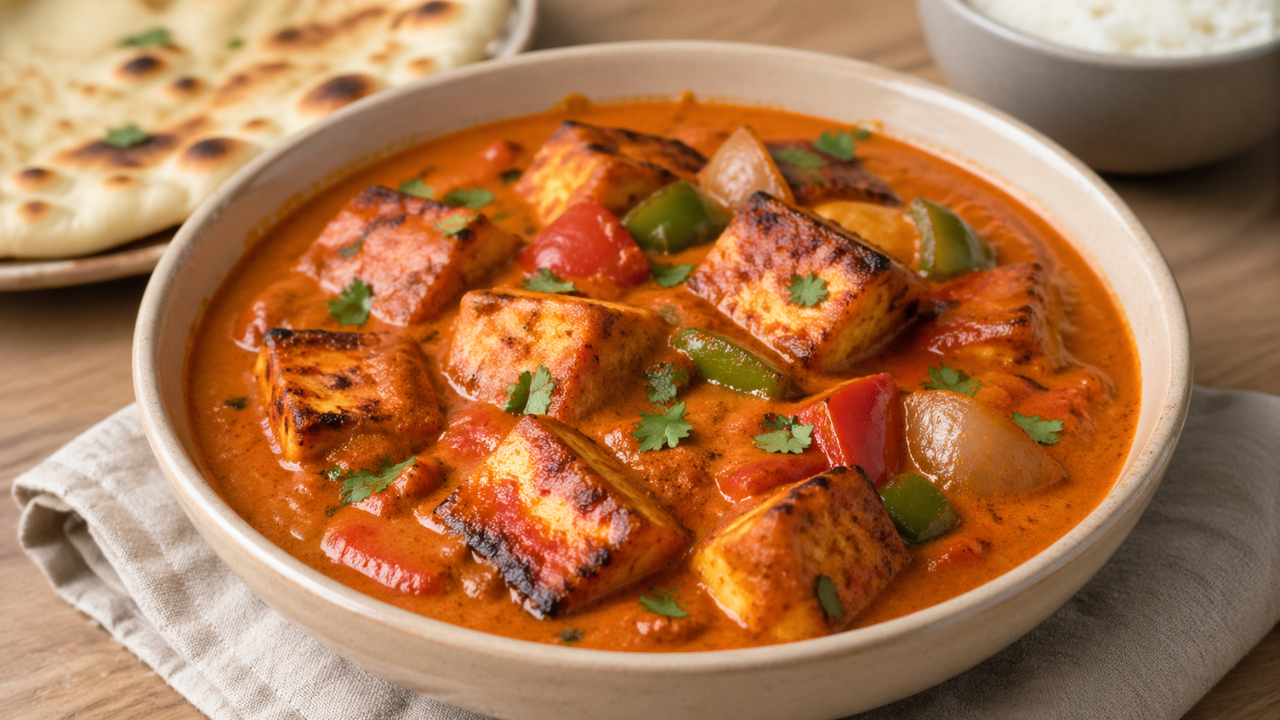
Paneer tikka masala often goes wrong in two places: the paneer turns rubbery, or the sauce tastes flat because everything is rushed into one pan. This version keeps the process practical. The paneer is marinated, grilled until browned, then folded into a simple masala sauce that is rich without being heavy.
The recipe is built around everyday cooking. You do not need a tandoor, special restaurant equipment, or a long list of hard-to-find ingredients. A grill pan, oven grill, air fryer, or even a hot skillet can give the paneer enough color to make the dish taste fuller. The key is to treat the paneer and the sauce separately until the final few minutes.
This paneer tikka masala with grilled paneer works well for dinner with rice, naan, chapati, or a simple salad. It also reheats better than many paneer dishes because the paneer is not boiled for too long in the gravy.
Why Grilled Paneer Makes Better Tikka Masala
Paneer tikka masala is best when the paneer has some browned edges before it meets the sauce. If raw paneer cubes are added straight into the masala, they soften, but they do not develop much flavor. Grilling gives the paneer light charring, a firmer surface, and better contrast against the creamy tomato sauce.
The goal is not to burn the paneer or make it dry. The goal is to cook it quickly at high heat so the outside browns while the inside stays soft. This is why the paneer should be cut into medium cubes, not very small pieces. Small cubes dry out too quickly and can break when stirred into the sauce.
Grilling the paneer separately also gives you more control. The sauce can simmer until it tastes rounded, while the paneer waits on the side. At the end, the grilled paneer only needs a short time in the sauce. This keeps the texture pleasant and avoids the rubbery result that happens when paneer is boiled for too long.
Ingredients for Paneer Tikka Masala
This recipe makes a practical family-style paneer tikka masala, enough for about four servings. The quantities are flexible. If you like more sauce, use the higher amount of tomato puree or add a splash more water near the end.
For the grilled paneer
- 400 g paneer, cut into medium cubes
- 4 tablespoons plain yogurt, thick if possible
- 1 tablespoon ginger-garlic paste
- 1 tablespoon lemon juice
- 1 tablespoon neutral oil
- 1 teaspoon Kashmiri chili powder or mild chili powder
- 1 teaspoon ground coriander
- 1/2 teaspoon ground cumin
- 1/2 teaspoon garam masala
- 1/4 teaspoon turmeric
- Salt, to taste
- 1 small onion, cut into chunks
- 1 small bell pepper, cut into chunks
For the masala sauce
- 2 tablespoons oil or ghee
- 1 medium onion, finely chopped
- 1 tablespoon ginger-garlic paste
- 250 to 300 ml tomato puree or blended tomatoes
- 1 teaspoon ground coriander
- 1/2 teaspoon ground cumin
- 1 teaspoon Kashmiri chili powder or paprika
- 1/2 teaspoon garam masala
- 1/2 teaspoon sugar, optional, only if the tomatoes taste sharp
- 100 ml cream, cooking cream, or a mix of milk and cream
- 100 to 150 ml water, as needed
- 1 teaspoon dried fenugreek leaves, crushed between your fingers
- Salt, to taste
- Fresh coriander, for finishing
Use fresh paneer if possible, but packaged paneer works well when handled correctly. If the paneer feels very firm from the packet, soak the cubes in warm water for 10 minutes, then drain and pat dry before marinating. This small step helps the paneer absorb the marinade and reduces toughness.
Useful Equipment and Product Selection
A grill pan is useful for this recipe because it gives the paneer browned lines and lets moisture escape quickly. Choose a heavy pan that holds heat well. A thin pan cools down when the paneer is added, which can make the marinade leak and steam instead of grill.
If you do not own a grill pan, do not buy one only for this dish. Use a heavy skillet, oven grill, or air fryer. The most important feature is strong direct heat. For skewers, metal skewers are easy to reuse, but soaked wooden skewers are fine for oven grilling. If using a skillet, skip skewers and cook the paneer cubes in batches.
For the sauce, a medium saucepan or deep frying pan is enough. A lid is helpful because tomato sauce splutters while simmering. A blender is optional if you want a smoother sauce, but it is not required for a practical home version.
7 Steps for Paneer Tikka Masala with Grilled Paneer
1. Prepare the paneer and vegetables
Cut the paneer into cubes of about 2.5 cm. This size is large enough to grill without drying out but still easy to eat. Cut the onion and bell pepper into similar-sized chunks so they cook at the same speed.
If using firm packaged paneer, place the cubes in warm water for 10 minutes. Drain well and pat dry. Do not skip drying, because wet paneer thins the marinade and prevents proper browning.
2. Mix the marinade
In a bowl, combine yogurt, ginger-garlic paste, lemon juice, oil, chili powder, coriander, cumin, garam masala, turmeric, and salt. Stir until smooth. The oil helps the spices spread evenly and reduces sticking during grilling.
Add the paneer, onion, and bell pepper. Fold gently with a spoon or your hands. Avoid aggressive mixing because paneer can break at the edges. Cover and marinate for at least 20 minutes. If you have more time, 1 to 2 hours in the fridge gives a stronger flavor.
3. Start the masala base
Heat oil or ghee in a pan over medium heat. Add the chopped onion with a pinch of salt. Cook until the onion turns soft and lightly golden. This takes a few minutes but is worth doing properly. Pale onion makes the sauce taste raw; very dark onion can make it bitter.
Add the ginger-garlic paste and cook for about one minute. Stir often so it does not stick. The mixture should smell cooked and rounded, not sharp.
4. Cook the tomato and spices
Add tomato puree, coriander, cumin, chili powder, and a little salt. Stir well. Let the sauce cook until it thickens and the oil starts to separate slightly at the edges. This is one of the most important parts of the recipe. If the tomato is not cooked enough, the final paneer tikka masala will taste sour and unfinished.
If the sauce sticks, add a small splash of water and continue cooking. Do not add all the water at once. A slightly thicker sauce cooks better and develops a deeper taste.
5. Grill the paneer
Heat a grill pan, skillet, oven grill, or air fryer until hot. If using a pan, brush it lightly with oil. Place the paneer, onion, and bell pepper in a single layer. Cook in batches if needed. Crowding the pan traps steam and stops browning.
Grill the paneer until browned on the edges, turning carefully. It does not need long cooking because paneer is already set. Once it has color, remove it from the heat. The vegetables should be slightly charred but still hold their shape.
6. Finish the sauce
Add water to the tomato masala and simmer for a few minutes. Lower the heat, then add cream. Stir gently and keep the sauce at a low simmer. Do not boil hard after adding cream, especially if using milk or a lighter cream, because it can split.
Crush the dried fenugreek leaves between your fingers and add them to the sauce. Add garam masala and taste for salt. If the tomatoes are too sharp, add a small pinch of sugar. The sugar should not make the sauce sweet; it should only balance acidity.
7. Add the grilled paneer and rest briefly
Add the grilled paneer, onion, and bell pepper to the sauce. Fold gently so the paneer stays intact. Simmer for 2 to 3 minutes, just enough for the grilled paneer to absorb some sauce.
Turn off the heat and let the dish rest for 5 minutes before serving. This short rest helps the sauce cling better to the paneer. Finish with fresh coriander and serve hot.
A Simple Texture-Control Method for Paneer
The easiest way to control paneer texture is to separate browning time from sauce time. Think of the paneer in two stages: high heat for color, low heat for coating. High heat creates browned edges. Low heat lets the sauce settle around the paneer. Long simmering does not improve paneer; it usually makes it firmer.
A practical kitchen test is to press one paneer cube before grilling and one cube after grilling. The grilled cube should feel firmer outside but still springy, not hard. If it feels dry all the way through, the heat was too low for too long, or the cube was too small. Next time, cut larger pieces and use a hotter pan.
Another useful method is to reserve two spoonfuls of the finished sauce before adding the paneer. If the paneer absorbs too much sauce or the dish becomes too thick while resting, stir the reserved sauce back in. This avoids adding plain water at the end, which can weaken the taste.
How to Serve It Without Extra Work
Paneer tikka masala is rich, so it is best served with something simple. Steamed basmati rice, jeera rice, naan, chapati, or plain paratha all work. For a lighter plate, serve it with cucumber, sliced onion, lemon wedges, or a quick yogurt side.
If serving guests, keep the paneer tikka masala slightly looser than usual. Sauces thicken as they sit, especially when cream and paneer are involved. Add a small splash of hot water before serving if needed. Stir gently and taste again for salt.
For a weekday meal, prepare the sauce ahead and grill the paneer just before dinner. This makes the dish faster and keeps the paneer fresh. You can also marinate the paneer in the morning and cook it in the evening, as long as it stays covered in the fridge.
Storage, Reheating, and Low-Waste Tips
Store leftovers in an airtight container in the fridge for up to two days. Paneer can firm up after chilling, so reheating needs gentle heat. Warm the curry in a covered pan over low heat with a splash of water or milk. Stir carefully and stop heating once the sauce is hot. Avoid boiling the paneer repeatedly.
If using a microwave, reheat in short bursts and stir between each one. Cover the bowl to prevent splatter. Add a spoonful of water before reheating if the sauce looks thick.
Leftover paneer tikka masala can be reused without feeling like the same meal. Spoon it into a wrap with sliced cucumber and onion. Use it as a filling for a toasted sandwich. Add a little water and turn it into a quick sauce for rice bowls. If only sauce is left, simmer it with boiled potatoes, chickpeas, or mixed vegetables.
Do not waste the marinade left in the bowl. Because it has touched paneer and vegetables, it should be cooked. Scrape it into the tomato masala while the sauce is simmering, before the cream is added. This adds spice and reduces waste, but it must be cooked well with the sauce, not stirred in at the end.
Common Problems and Quick Fixes
If the paneer is rubbery, it was probably cooked too long after grilling. Next time, grill quickly and add it to the sauce only at the end. For the current dish, add a splash of cream or milk and warm gently. It will not fully reverse the texture, but it can soften the eating experience.
If the sauce tastes sour, the tomato base needs more cooking or balancing. Simmer it a little longer before adding the paneer. A small pinch of sugar or a spoonful of cream can help, but do not overdo either. The better fix is usually time on the stove.
If the sauce is too thick, add hot water in small amounts. Cold water can lower the temperature too much and make the sauce uneven. If the sauce is too thin, simmer it uncovered before adding the paneer. Once paneer is in the pan, avoid reducing for a long time.
If the marinade slides off during grilling, the paneer was likely wet or the yogurt was too thin. Pat the paneer dry next time and use thicker yogurt. You can also add a teaspoon of gram flour to the marinade to help it cling, but keep the amount small so the coating does not become pasty.
If the spices taste harsh, they may not have cooked enough in the tomato base. Let the masala simmer until it smells rounded and the color deepens. Spices added only at the end can taste dusty, so most of them should cook with the tomatoes.
Conclusion
Paneer tikka masala with grilled paneer is worth repeating because it gives strong flavor with simple steps. The paneer gets color before it enters the sauce, the tomato masala cooks until it tastes complete, and the final simmer stays short so the texture remains soft.
It is also a practical recipe for home cooking. The ingredients are common, the method is flexible, and leftovers can be reused in wraps, sandwiches, or rice bowls. With a hot pan, a balanced sauce, and careful reheating, this dish stays low-waste, affordable, and reliable for everyday meals.
