
Veg Kolhapuri is useful when you want one curry that can handle a mixed vegetable drawer, taste rich without restaurant effort, and still work for weekday meals. The common mistake is making it too oily, too fiery, or too watery. This version keeps the curry bold but controlled, using an 8-spice masala and a simple cooking order so the vegetables stay tender, not mushy.
This Veg Kolhapuri recipe is built for home cooking. You can use cauliflower, carrots, beans, capsicum, peas, potatoes, or whatever firm vegetables you already have. The masala is roasted, ground, cooked with onion and tomato, then finished with vegetables and a small amount of cream or coconut for balance.
What Is Veg Kolhapuri?
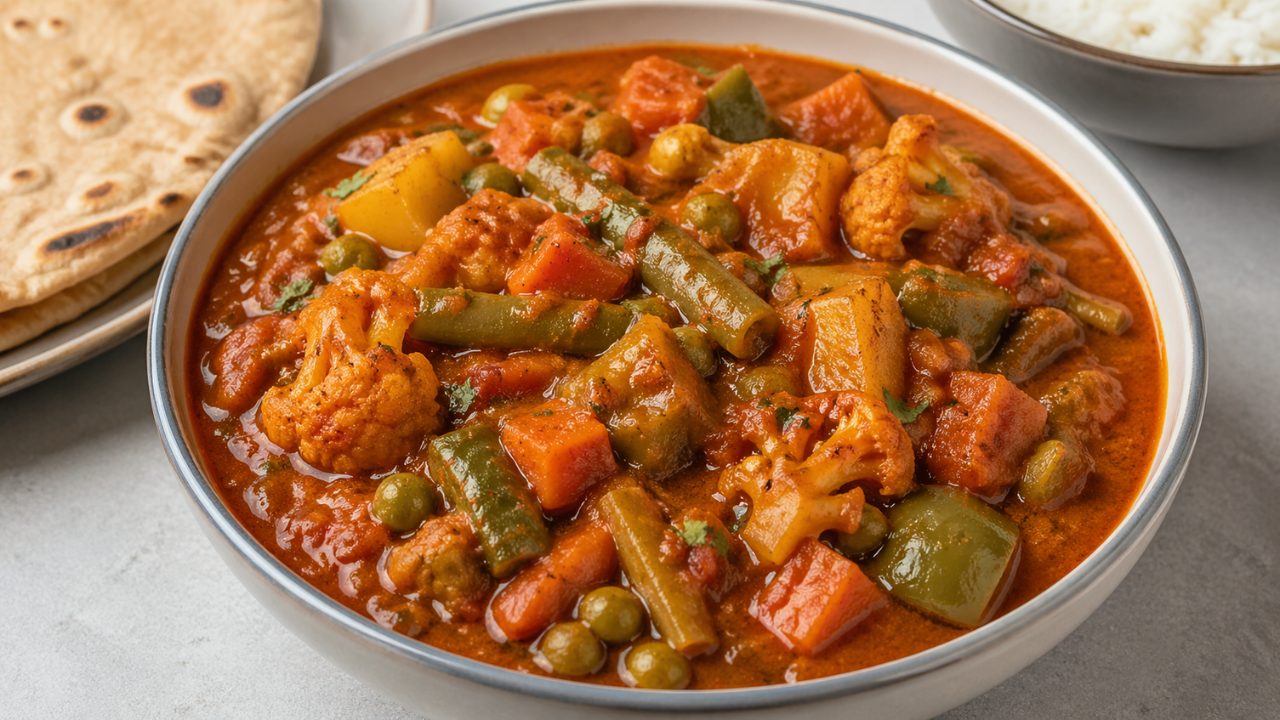
Veg Kolhapuri is a spicy mixed vegetable curry with a roasted spice base. It is usually thicker and more intense than a simple tomato curry. The taste comes from dry spices, coconut, onion, tomato, and a little fat to carry the masala.
At home, the goal is not to copy a restaurant exactly. The better goal is a curry that is strong enough for roti, chapati, naan, paratha, or rice, but not so heavy that leftovers become oily. A good homemade Veg Kolhapuri should have a thick coating gravy, visible vegetables, and a warm spice finish.
The 8-spice mix in this recipe uses coriander seeds, cumin seeds, fennel seeds, black pepper, cloves, cinnamon, cardamom, and dried red chillies. These spices give depth without needing many packaged masalas.
Ingredients for Veg Kolhapuri
This recipe serves 4 people. Keep the vegetables cut to a similar size so they cook evenly.
For the vegetables
- 1 cup cauliflower florets
- 1 small carrot, diced
- 8 to 10 green beans, chopped
- 1 small potato, diced
- 1/2 cup green peas
- 1/2 capsicum, diced
- Salt, as needed
- Water, as needed
For the 8-spice Kolhapuri masala
- 2 tablespoons coriander seeds
- 1 teaspoon cumin seeds
- 1 teaspoon fennel seeds
- 6 black peppercorns
- 3 cloves
- 1 small piece cinnamon
- 2 green cardamoms
- 3 to 5 dried red chillies, adjusted to taste
- 2 tablespoons desiccated coconut or dry grated coconut
- 1 tablespoon sesame seeds or poppy seeds, optional
For the curry base
- 2 tablespoons oil
- 1 medium onion, finely chopped
- 1 tablespoon ginger-garlic paste
- 2 medium tomatoes, chopped or pureed
- 1/4 teaspoon turmeric powder
- 1/2 teaspoon Kashmiri chilli powder, optional for colour
- 1/2 cup water, plus more as needed
- 2 tablespoons cream, milk, coconut milk, or cashew paste
- 1 tablespoon chopped coriander leaves
- 1 teaspoon lemon juice, optional
Useful Equipment for Better Masala
A small heavy pan and a basic grinder are the most useful tools for this recipe. A thin pan can burn coconut and spices quickly, giving the curry a bitter taste. A heavy steel, iron, or non-stick pan gives you more control while roasting.
If you make spice pastes often, choose a grinder jar with a small base. Large jars struggle with small quantities and leave coarse pieces of chilli, coconut, or coriander seed. A small jar gives a smoother masala with less water. This matters because too much grinding water can make the curry taste diluted before the masala has fried properly.
You do not need special cookware. A regular kadai or deep pan is enough. The only useful rule is this: roast on low to medium heat and grind only after the spices cool. Hot spices release steam in the grinder and can turn the powder clumpy.
How to Make Veg Kolhapuri at Home
Start by preparing the vegetables. Cut potato and carrot slightly smaller than cauliflower because they take longer to cook. Keep capsicum separate because it cooks faster and should stay slightly firm.
- Bring water to a boil with a little salt. Add potato, carrot, beans, cauliflower, and peas. Cook until just tender. Do not cook them until soft. Drain and keep aside. You can also steam them instead.
- Heat a dry pan on low to medium heat. Add coriander seeds, cumin seeds, fennel seeds, peppercorns, cloves, cinnamon, cardamom, and dried red chillies. Roast until the spices smell warm and slightly toasted.
- Add coconut and sesame seeds, if using. Roast for another minute. Stir constantly because coconut burns fast.
- Transfer the roasted mixture to a plate and let it cool. Grind it into a powder or paste. Add only 2 to 4 tablespoons water if needed.
- Heat oil in a kadai. Add chopped onion and cook until golden at the edges. This step gives body to the gravy, so do not rush it.
- Add ginger-garlic paste. Cook for about one minute, until the raw smell reduces.
- Add tomatoes, turmeric, Kashmiri chilli powder, and salt. Cook until the tomato breaks down and the oil starts to separate slightly from the masala.
- Add the ground Kolhapuri masala. Fry on low heat for 3 to 4 minutes. If it sticks, splash in a spoon of water and continue cooking.
- Add the boiled vegetables and capsicum. Mix gently so the masala coats everything.
- Add 1/2 cup water and simmer for 6 to 8 minutes. Keep the curry thick, not soupy.
- Stir in cream, milk, coconut milk, or cashew paste. Simmer for one more minute. Finish with coriander leaves and lemon juice if the curry tastes too heavy.
Let the curry rest for 5 minutes before serving. The gravy thickens slightly as it sits, and the spice flavour becomes more rounded.
The Practical Masala Test That Prevents a Harsh Curry
The most useful check in this Veg Kolhapuri recipe is the “wet spoon test.” After adding the ground masala to the onion-tomato base, fry it for a few minutes, then touch a small bit of gravy with a wet spoon and smell it. If it smells sharp, dusty, or raw, the dry spices have not cooked enough. If it smells warm, nutty, and rounded, you can add the vegetables.
This small check prevents a common home-cooking problem: adding vegetables too early. Once vegetables go in, they release moisture and lower the temperature of the pan. The masala then simmers instead of frying, which can leave a raw spice taste even after the curry looks done.
Another practical sign is the edge of the pan. When the masala is ready, it looks slightly darker and thicker, and the oil leaves tiny glossy spots around the sides. You do not need a lot of oil for this. You only need enough cooking time before adding water.
Adjusting Spice, Thickness, and Texture
Kolhapuri-style curry is expected to be spicy, but it should still be edible as a meal. If you want a milder curry, use fewer dried red chillies and add more Kashmiri chilli powder for colour. Kashmiri chilli gives colour without the same heat level as many hot dried chillies.
If the curry is too spicy after cooking, do not add sugar first. Add 2 tablespoons cream, coconut milk, or cashew paste and simmer gently. Fat softens the sharpness better than sweetness. A small squeeze of lemon at the end can also balance a heavy, hot gravy.
For a thicker curry, simmer uncovered for a few minutes. Do not add extra ground coconut at the end because it can taste raw. For a thinner curry, add hot water in small amounts. Cold water slows the simmer and can make the gravy taste flat.
For better vegetable texture, cook firm vegetables first and capsicum last. Cauliflower, potato, carrot, and beans need time. Capsicum needs only a short simmer. This keeps the curry colourful and avoids the soft, overcooked taste that often happens in mixed vegetable curries.
Serving Ideas
Veg Kolhapuri works best with simple sides. Chapati, phulka, tandoori roti, naan, paratha, and steamed rice all work well. If serving with rice, keep the curry slightly looser. If serving with roti, keep it thick so it can be scooped easily.
For a practical meal, serve it with plain curd, sliced onions, cucumber, or a simple salad. These sides cool the heat and make the meal feel balanced without extra cooking.
If you are cooking for guests, make the masala base earlier in the day. Boil the vegetables separately and combine them 15 minutes before serving. This keeps the vegetables fresh and prevents the gravy from drying out too much.
Storage and Reheating
Veg Kolhapuri keeps well in the fridge for 2 days. Store it in a covered container after it cools. The gravy thickens because of coconut, onion, and cooked vegetables, so expect to add water while reheating.
Reheat on low heat with 2 to 4 tablespoons hot water. Stir gently. Avoid boiling hard after adding cream or milk because the gravy can split or turn grainy. If you used coconut milk or cashew paste, reheating is easier, but low heat is still better.
For leftovers, turn the curry into a quick wrap filling. Mash a few potato pieces into the gravy to thicken it, warm it until almost dry, then roll it in chapati with onion and coriander. This reduces waste and avoids serving the same curry in the same way again.
Troubleshooting Veg Kolhapuri
If the curry tastes bitter, the spices or coconut may have burned during roasting. Next time, roast on lower heat and add coconut only at the end. Burnt coconut is one of the fastest ways to spoil the gravy.
If the curry tastes raw, the masala was probably not fried long enough after grinding. Simmering alone cannot fully fix this. Cook the masala properly before adding vegetables and water.
If the curry is watery, simmer uncovered. You can also mash two or three potato pieces into the gravy. This thickens the curry without adding more fat.
If the vegetables are mushy, they were boiled too long before being added to the masala. Boil only until nearly cooked. The vegetables will finish cooking in the gravy.
If the curry lacks depth, check salt first. Then add a small splash of lemon juice. Flat curries often need balance, not more spice. Adding more chilli at the end usually makes the curry hotter but not better.
Conclusion
This Veg Kolhapuri Recipe gives you a bold 8-spice mixed vegetable curry without complicated steps or expensive ingredients. It uses everyday vegetables, a practical roasted masala, and a cooking method that keeps the gravy thick and the vegetables intact.
It is low-waste, flexible, and easy to repeat with whatever is already in the kitchen. Once you learn the masala frying point and adjust the heat to your taste, Veg Kolhapuri becomes a reliable home curry for roti, rice, packed meals, and leftovers.
